Growing wood ear mushroom (Auricularia specie) on logs is one of the oldest techniques there is, yet not quite outdated. As long as the piece of wood has not decomposed, mushroom can be harvested for years and years on the same log–making it a good, profitable long-term investment for mushroom farmers.
Let's see some ideas now:
What Type of Wood Is Good For Growing Wood Ear Mushroom?
Wood from these trees are good for growing wood ear mushroom:
- Vegetable hummingbird (Sesbania grandiflora linn)
- Kapok/Java cotton tree (Ceiba pentandra)
- Mango tree (Magnifera)
- Jackfruit/Breadfruit (Artocarpus integrifolia)
- Cluster fig (Ficus racemosa)
- Sacred fig (Ficus religiosa)
- Ambda (Spondias pinnata)
- Weeping fig (Ficus benjamina linn)
- Earleaf acacia (Acacia auriculiformis Acunn.)
- River tamarind (Leucaena leucocephala)
- Soursop/custard apple (Annona muricata)
Alternatively, you could also use wood from rubber tree. Using softwoods and hardwoods is both possible. However, from experience, softwoods tend to allow faster and more mushroom growth.
When choosing the wood, you should choose fresh ones with thick bark and non-poisonous latex. Fresh wood are softer (easier to work with) and conidial fungi have not developed inside them. In the fresh state, the wood contains a good amount of nutrients, which is also good for our mushroom growth.
Avoid using wood with bitterness. Dried wood may not be used because they give lower yield.
Let's see the growing steps next:
Step 1: Sawing the Wooden Logs
The wood for growing wood ear mushroom can be from the base or the branch. About 10-20 cm (4-8 in.) in diameter is good enough. The length can be 1m (3ft), 1.5 (5ft) or 2m (6.5ft) depending on your space and how convenient you find to stack them up.
It is good to use inoculate the log as soon as it is sawed down. For softwoods, the waiting time can be 2 weeks and for hardwoods 3 weeks.
Usually, after sawing people hover the log ends on fire to dry them. For trees with a lot of latex (like jackfruit, rubber or fig), you can lay the log slanted on one side for a week so the latex flows out. We can hover the logs on fire after that.
The latex in those tree is not poisonous to the mushroom. However, it leaves that rubbery scent in the mature mushroom from the host tree it lives.
When sawing, cut a sharp smooth line. Avoid any breaking or tearing of the bark part. If some bark is broken, dab some lime water on to avoid any bacterial infection. Then, stack your wooden logs in a safe place.
We can then get ready for step 2:
Step 2: Hammering Holes On Logs
This is probably the most time-consuming part of the process. If you're a carpenter or do woodworking, you can use a special tool to help you hammer many holes in one go, nice and clean. Alternatively, you can use a handheld drill.
Each hole is about 1.2-1.5 cm (2/5-1/2 in.). The depth about 2cm (7/10 in.) is good enough. On each log, you can drill holes in rows.
The hole-to-hole distance is about 10-15 cm (4-6 in.). The row-to-row distance is 10 cm (4 in.). On both ends of the log, leave 5-10 cm (2-4 in.) where we don't punch any holes.
Alternate the rows. When done, the log will look something like this:
/drilling-wood-ear-mushroom-log.jpg?ref=zenyrgarden.com)
If you use a hammer, you can keep the piece of bark for each hole. We will use them as plugs to close the holes after inoculating:
Step 3: Inoculating the Logs
To inoculate the holes we've just made, place a small funnel over the hole mouth, then use the tip of a small spoon to scoop some spawn out and fill it in. Don't stuff in too much spawn in one hole, but just about 2/3 way up.
Then we will use the bark piece (that we hammered out in the previous step) to cover that same hole. Hammer it in a few times so the bark plug stays level with the rest of the bark. Use beeswax or clay to seal any air around the plug to avoid bacterial infection. Avoid using hot wax as it could kill the spawn.
If you use drill, and the original bark piece is now in dust, you could use plastic plugs as an alternative. These are available at most spawn stores. Wax can also be used directly as a plug.
For 500 ml (17 oz) of liquid inoculant, 15 logs about 1m (3ft) in length can be inoculated.
We will show you now how to incubate the logs.
Stacking & Incubating Spawned Logs
After inoculating the logs, you can move them into a tent, somewhere with roofs with cool airing fresh air. If you're stacking the logs out in the yard, under a big shaded tree is a good place.
Besides an airing roof, the floor for the wood stack could also be considered. Tiled or cemented floor is good enough for indoors. If you're placing the stack outside, you can elevate it on two hardwood sticks about 20cm (8 in.) up ground to avoid contamination. Place the sticks parallel to each other, 80cm apart if your spawned log is 1m (3ft) long or 1m (3ft) apart if your log is 1.2m (4ft).
To stack the logs, you can alternate the direction of each layer. For example, the first layer is horizontally laid, then the next is vertically laid logs. Each log is placed about 3cm (a little more than an inch) apart. When the stack reaches 1.5m (5ft) in height, where it's easy to look after and maintain them, we can move on to another stack.
Indoor stacks don't usually need a cover. For outdoor ones, you can cover them with burlap, coconut leaves (big leaves), banana leaves or straw for keep the humidity for the shroom to grow.
Monitoring the Humidity:
On rainy days, the humidity for the logs is good so we don't need to water the stack. On hotter days, we can water daily or every other day. Every watering could be about 15 mins so it's just moist enough. And we shouldn't water it for too long.
The log needs good moisture to help the mycelium grow and run through all the wood fiber. When the log is dry, it's hard for the mycelium to flow through and sometimes it dies.
When you know that mycelium is growing inside the wood, we can stop watering. This could take several weeks.
Re-orienting the Logs:
We can re-orient the logs once a week so each gets an even distribution of moisture and air around. Some basic ideas can be:
- Upper logs move to lower logs
- Outside logs move inside
- Underside of log turn to upperside
- Switch head and tail of log
For each re-orientation we still keep the log-to-log distance the same, 3cm (a little over one inch). After it's done, spray the wood to keep it moist.
After 3 re-orientations (about 21 days), when we see white mycelium growing strong inside the wood, we can stop.
To tell if the mycelium is running, people take a piece of log and slice it down on either end. This is why we leave about 5-10cm (2-4 in.) on both ends (no holes) at the start for convenient checking. If you see the wood has a shade of white, has that scent of mushroom, then it is a good log. We can stop re-orienting and stop watering it now.
However, it you see the inside of the wood has turned black, then it means the spawn is dead. You can discard the log. If no mycelium is growing yet, then give it some time, continue incubating and change the log position every 7 days.
Keeping the Hygiene of the Incubating Stacks:
Keep an eye out for any weird, wild mold developing on the log. When you notice some appearing, you can use a razor blade, brush to scrape it off. Use some alcohol IPA to sanitize it a bit. During the first 3 weeks, if your see little ears coming out, don't be too excited! Scrape them off, those are not the wood ear we're looking for.
Getting Logs Ready For Harvesting
When you slice the log down and see those white mycelium growing, you're one step closer to success! Stack your logs back to their position. But this time, instead of placing them 3cm (1.1 in.) apart, place them 5-6 (1.9-2.3 in.) apart.
The Dry Period:
Then, for the next 3-4 weeks we will not water it. We will keep them dry like that. During this time, the mycelium will grow wild inside the wood log. Continue keeping the hygiene for the stack. If anything weird shows up, pluck them off immediately.
The Soaking Period:
After the 3-4 week dry period, we will soak the logs in water for 12 hours straight. Unlike other mushroom spawn like oyster, wood ear shroom spawn is not sensitive to prolonged contact with water. This helps the wood to be a bit softer, the mycelium to grow easier, and to help the shroom digest the available nutrients in the wood easier. It can also kill off any ants/termites living in the tree.
Getting Ready for Harvest:
After the submersion, move all the logs indoors. Place them against a horizontal bar so each two logs make like an X or A letter. As we leave some space on both log ends (no holes), this gives the uppermost and lowermost shroom some room to grow out. This stacking makes it easier to take care of them for the soon-coming shroom welcoming period.
Lift them up from the floor a bit for cleanliness. Then, after stacking, cover them with burlap or greenhouse cover for a few days to raise the temperature inside the wood up. During those several days, mushroom heads will start popping up, with some white here and some white there that is very pleasant and exciting to look at.
Lift the burlap cover up and mist them lightly a few times a day. Just lightly so it's moist enough and don't let the water pool down on the floor. At night, open the windows to let cool fresh air in. At daytime, close all windows. This is what we do at this final stage.
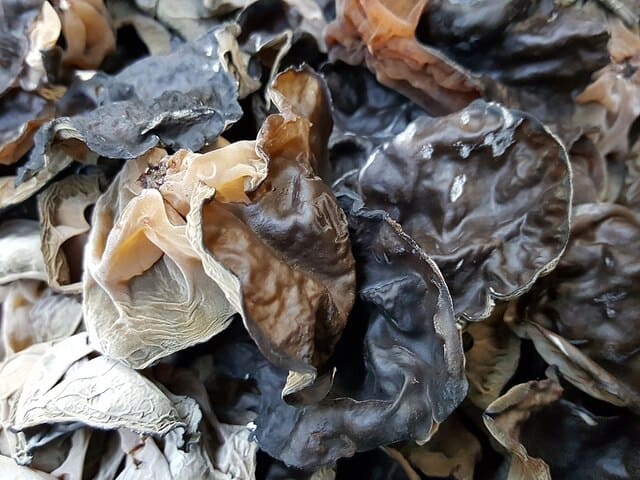
Harvesting!
Wood ear mushroom gives long and multiple harvests. This is why in the beginning we said it is a good mushroom for long-term investment. We can harvest it from year to year if we want until the log decomposes.
In the first flush, the harvest can continue for up to 4-5 months.
When the young shroom just fruits, it has a cup-like shape. When it matures, it will bloom out being of that wavy shape of an ear. When it's young, the edge of the ear is thick. But when it's mature, the edge of the ear is thinner.
Unlike paddy straw mushroom, which we can harvest multiple times a day, for wood ear shroom we can harvest once a day. Choose big ears and pluck them out of the wood hole. Leave the small ears to grow bigger for later harvest.
When you see the mature ear doesn't seem to grow any bigger, you can stop the first harvest. At this time, shrooms may grow here and there scattering, twist them off even smaller ones.
During the harvesting time, we will still water our logs. Every 2 weeks, we can re-orient the logs so humidity gets distributed evenly.
After the first harvest, the bare logs now can rest for several weeks to return for the next harvest. For the second harvest, we can get back to the 'Getting Ready for Harvesting' step and go from there.
I will add pictures soon to this post.
Share or pin this post!
(to be created)