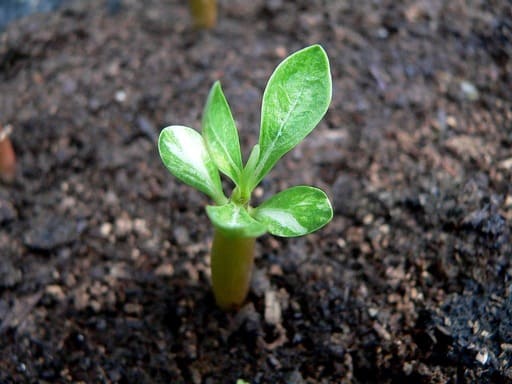
When adenium seeds are not available, you can propagate the plants by cuttings or air layering. We should watch out for rots because it might kill the clones.
Let's begin seeing how with:
Some Notes
Adenium grown by cuttings may not develop a caudex. If you're looking for a fat adenium caudex, you'll have greater chances growing them from seeds. There are times when the caudex develops but not too big. The adenium cuttings will still bloom and produce seed pods if conditions are sufficient.
Now, let's begin with:
Air Layering Adenium
Instead of cutting a branch off from the main tree, we cut a small part off the branch & allow the tree to take root from there.
Air layering has been around for a very long time. The advantage of this method is that the branch of the tree that you clone will be the same age (with all the identical genes & cell 'memory') as the original tree. If you take a clone of a 3-year-old adenium, that clone starting out on new soil will also be 3 years old. It can grow into a full size tree.
There are many air layering styles. Here are the brief steps of the first one, which is called:
1. Duck Beak Air Layering
To do the duck beak style air layering, first, sterilize the knife. Cut off some leaves on the branch to prevent root rot. Cut a duck-beak shape on 2/3 of the branch. It looks something like this:
/duck-beak-cut-adenium.jpg)
Put a small leaf in between the cut (aka the duck beak or "alligator mouth") to keep its shape. Dry the cut 1-2 days in a porch. When the cut stiffens up, tape it with some nylon or masking tape:
/tape-around-the-new-cut.jpg)
Depending on the species, it can take 2-8 weeks before the cut takes roots. After that, unwrap the tape. You can see new roots have formed here:
/adenium-roots-shooting-out.jpg)
Then, wrap a moss ball around the cut:
/moss-ball-around-the-adenium-cut.jpg)
You can use sphagnum moss, coco coir, soil or anything that holds moisture to make the ball. For faster growth & protection, soak the medium in root hormone or anti-fungal solution.
Finally, when the roots get bigger, longer (a thicker mass), cut off the branch & plant it into the soil. You'll get a new clone of your existing branch.
Let's now see air layering style #2:
2. Pencil Head Air Layering
/pencil-head-air-layering.jpg)
The advantage of this style is that the roots will sprout out from all around the air-layered part instead of just one side like the duck beak style. It's very easy to do.
Let's see how:
First, depending on the diameter of your branch, divide it into equal parts all around by marking with a pen marker.
/divide-branch-into-equal-parts.jpg)
After marking, cut along the marked points:
/cut-the-marked-portions.jpg)
The first cut is like this ––– horizontal in. Then, the rest of the cut is like this / or \ all the way around the branch. So your end result will look something like a pencil head.
/dry-the-branch-for-one-day.jpg)
After drying it for about one day, wrap a small plastic container or cup of the same or bigger size around the layered point:
/pour-soil-into-plastic-cup.jpg)
You can use some carbonized rice hulls or something that holds moisture well here. Water it regularly as the medium dries. This stuff is light & airy, making it great for new roots to form.
After 2-3 months, the layered part will start to form roots. Cut the branch off & plant into the soil then. You have successfully cloned an adenium branch with all of its original genes for preservation. Pretty cool.
If you don't like the air layering method we've just seen, here is another way we can go about propagating if you like:
Growing Adenium From Cuttings
With this way, you can first cut strong branches from mother tree. Then, let it dry for 7-10 days. You can apply wood glue or scar glue on the wounds to prevent bacterial infections. Use root hormone if you want faster growth.
/adenium-cuttings.jpg)
Then, prepare the soil. It can be:
- 50% garden soil
- 30% vermicompost
- 20% coco peat
Or:
- Carbonized rice hulls
- Coco coir
Plant the cuttings 3 inches (7 cm) into the mix:
/plant-adenium-cuttings.jpg)
Water it thoroughly the first time. Then, keep in shade for 7-15 days.
After 3-4 weeks, tiny root strings may begin to shoot out. Remember to avoid contact with water for the cuts to avoid rotting. And keep the planted cuttings somewhere warm to avoid root rot.
If well cared for, your adenium cuttings may bloom 11 months after planting. Some growers have 40-50% success while others have 80-90% success with this method.
/result-of-adenium-propagating.jpg)
If all is good, the propagated cutting can throw out some really nice flowers:
/bloom-from-adenium-cuttings.jpg)
Growing Adenium From Seeds
If you'd like to check out how to grow adenium from seeds, here is a good guide:

Thanks to:
Many people subscribe to the above YouTube channels, it really helps. See you again next time!
Share or pin this post!


